|
|
Post by sebastian on Apr 4, 2009 14:38:39 GMT -5
I'll be making a banner for my camp soon, and I'm stumped as to how to make the pole for it. I'm assuming that it would have to break down at the top (where the top bar meets the vertical pole). Unless the loops on the banner are somehow made to open and close? I had planned on sewing the banner loops just closed and to the fabric, so that it would have to be slid down the pole, and then the horizontal pole slipped into the top loops and attached to the vertical. Any ideas? I couldn't find any info on just the poles themselves and not the whole banner.
Also, if anyone has some rough measurements on the size of most banners, that would be great.
|
|
Saionji Shonagon
New Member
 One dreamed of becoming somebody. Another remained awake and became. (Found in a fortune cookie.)
Posts: 7,240
|
Post by Saionji Shonagon on Apr 5, 2009 17:20:41 GMT -5
|
|
Lash
New Member
perfection isnt an end result but a path to walk upon with your eyes closed.
Posts: 422
|
Post by Lash on Apr 5, 2009 18:26:38 GMT -5
someone say Lash!! ;D  Seriuously though I just completed the pole and banner for the black company . I used an 2- 6'x1"1/2 wooden closet rod uprights with an 1"1/2 electrical conduit coupler so we could collapse the vertical for storage but still have 12' heigth . on the top we used an 1"1/2 conduit 90 deg elbow for the horizontal piece and couched a 4' pice of closet rod . we wrapped the mundane pieces with leather and stained the poles black it is very strong even in the harsh winds we had at last estrella . You should be able to pick the pieces up at any home depot or electrical supply store. I took a small piece of the wooden closet rod with me to make sure i found the right size conduit materials. Hope that helps ! Lash |
|
|
|
Post by sebastian on Apr 5, 2009 23:21:31 GMT -5
I was thinking something similar. I've been scouring pictures of nobori all day and it looks like most have to top pole fed into the vertical pole with maybe a nut or a bar and a pin to secure it (with some extra couple inches hanging off the back).
I only plan on having the cloth part itself being about 3'x1', maybe a little more. Though I would want a nice way to have the pole break down in the middle for easy transport. The biggest part is that the top pole needs to be removable. Not just for transport, but because the loops on the flag prevent you from attaching it to both poles if they were connected. You HAVE to slide the top pole through the loops and then secure it.
The closet rods sound like a great idea though. I think I'll take a look at lowe's tomorrow and see if they have some in a bamboo like texture, or maybe a thin rattan to get a better feel to it.
I don't think I'll be able to do the conduit and leather, as I have no idea where to get leather locally. Haha.
Thanks for the info!! Pics will follow as soon as it's done (tomorrow if I have my way)
|
|
|
|
Post by Please Delete on Apr 6, 2009 3:01:11 GMT -5
Modern banner poles in Japan are often collapsible, coming in three sections: The two poles (one fits inside the other) and the crosspiece, that goes through the top. I imagine something similar for the crosspiece could be achieved with bamboo or wood.
If you go with straight lashings, make sure your wraps and fraps are tight. Also, you'll want to lash it together after putting the banner on, if it is a typical rectangular design--unless you make the various tabs on the banner large enough to make it around the corner. Finally, if your square lashing skills leave something to be desired (or you are just working with material with a bit of give), then you can add a stabilizing cord from the top of the vertical pole to the end of the crossbeam to help keep it at the proper angle.
The other issue is making sure that the banner doesn't fold in on itself: Japanese modern banner poles have a little backwards hook that keeps the banner taut. Otherwise, it tends to creep up the crossbeam and you get a folded mess. Probably splitting the crossbeam a bit towards the very end would help with this.
|
|
|
|
Post by JanxAngel on Apr 6, 2009 10:13:12 GMT -5
Michaels Arts & Crafts usually have scrap bags of leather/suede for $5-$10. You can also order a scrap grab bag from Tandy Leather Factory online.
|
|
|
|
Post by Imagawa Tadamori on Apr 6, 2009 12:01:49 GMT -5
Sebastian, PM me. I may be able to do something for you regarding the leather... I have a lot of small pieces right now... and all it will cost you is the postage. Does that work for you?  - Imagawa |
|
|
|
Post by sebastian on Apr 6, 2009 17:15:06 GMT -5
That sounds geat imagawa Let me check with the craft stores and such tomorrow to see if I can find something local, and I'll get back to ya! Edit!: Made up a rough nobori since it's my first one. I need to cover up the black lines I drew to mark spots on the sides, and put some fray stopper on the sides of the fabric. I just traced the circle where my mon is going, and the 2 lines at the top. 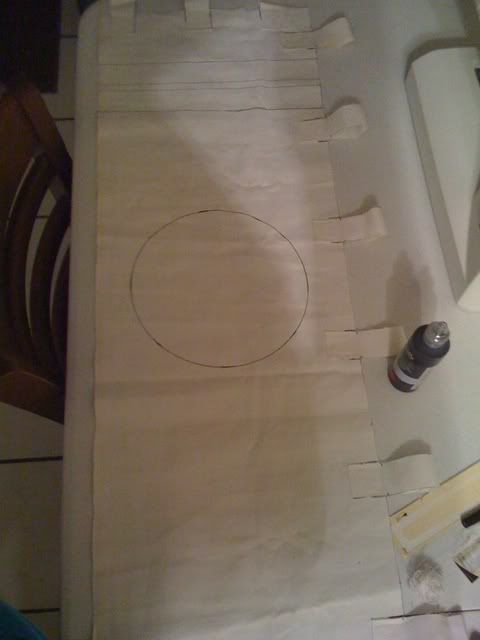 |
|
|
|
Post by sebastian on Apr 10, 2009 23:08:01 GMT -5
Update on the detail Still have yet to buy pole stuff though  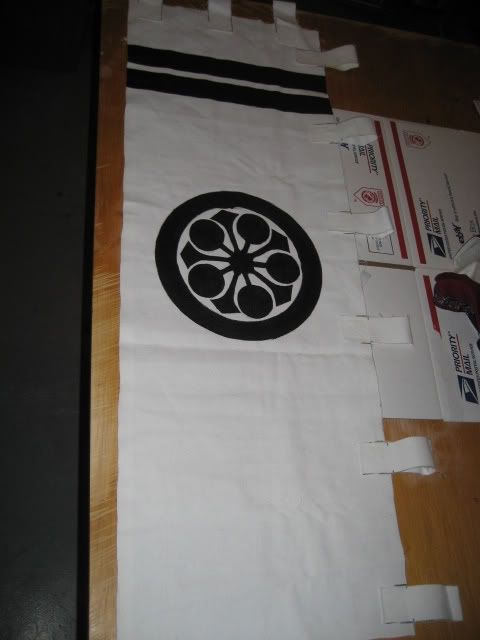 Thinking of adding another 2 lines at the bottom to fill up some of that massive blank space. |
|
|
|
Post by JanxAngel on Apr 11, 2009 7:33:35 GMT -5
I think it looks fine with the blank space. About the edges of the fabric: You need to turn the edges under twice then stitch the fold down to keep it from fraying. If you plan on using the one you have already, use a narrow zig zag stich along the raw edges to keep the fraying down.
|
|
|
|
Post by sebastian on Apr 11, 2009 11:54:33 GMT -5
Actually planned on using a fray lock liquid on the edges instead of sewing them.
|
|
Lash
New Member
perfection isnt an end result but a path to walk upon with your eyes closed.
Posts: 422
|
Post by Lash on Apr 11, 2009 20:29:49 GMT -5
that looks awsome!! If you cant find leather to wrap the conduit pieces you could use an SCA staple sticky felt!!
all walmarts have it in the craft sections . it works in a pinch .
I like the banner the way it is !! very clean !!
great job!
|
|
|
|
Post by sebastian on Apr 11, 2009 20:53:49 GMT -5
Thank you I'll be painting the reverse side tonight so that it isn't just one sided. I picked up dowels for them tonight and cut a notch for the top pole. Going to bolt and wing nut them together, or maybe just a pin and clip style thing. More photos tomorrow when I finish it up I may or may not wrap the dowels in a leather, just to get a nicer look. But I'm not sure yet. |
|