|
|
Post by Fukumitsu Noriatsu on Sept 1, 2014 0:17:07 GMT -5
Greetings all,
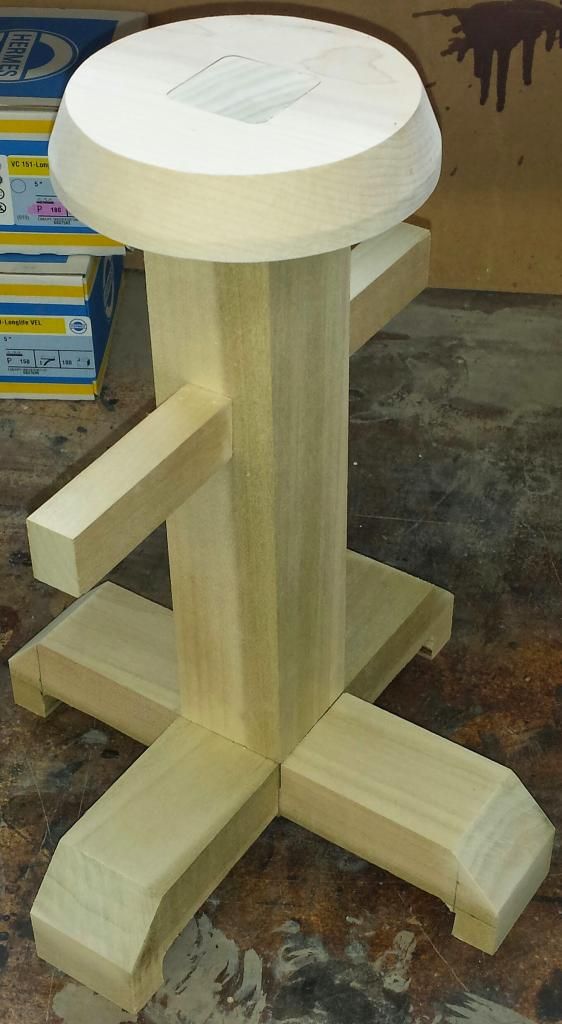
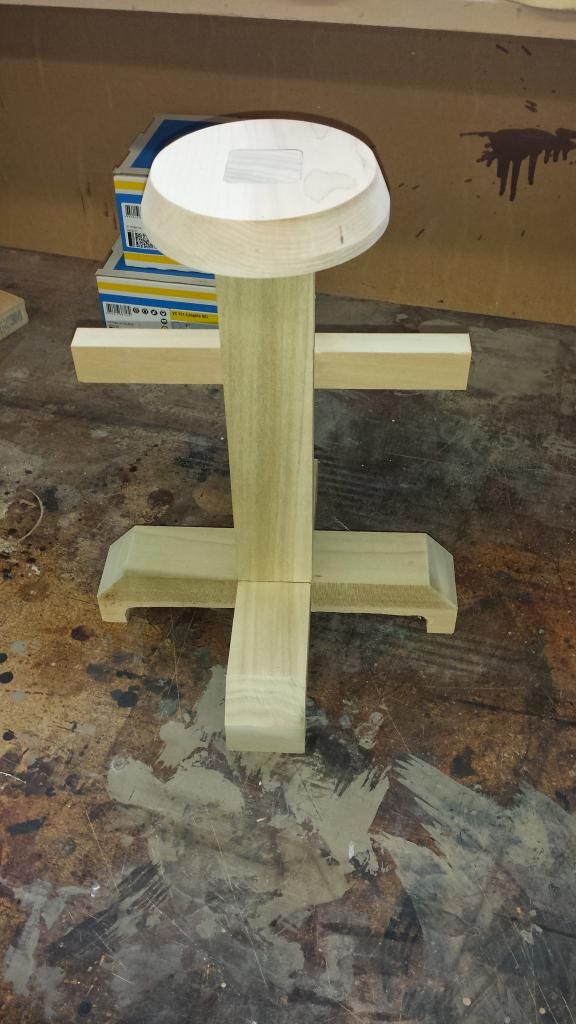
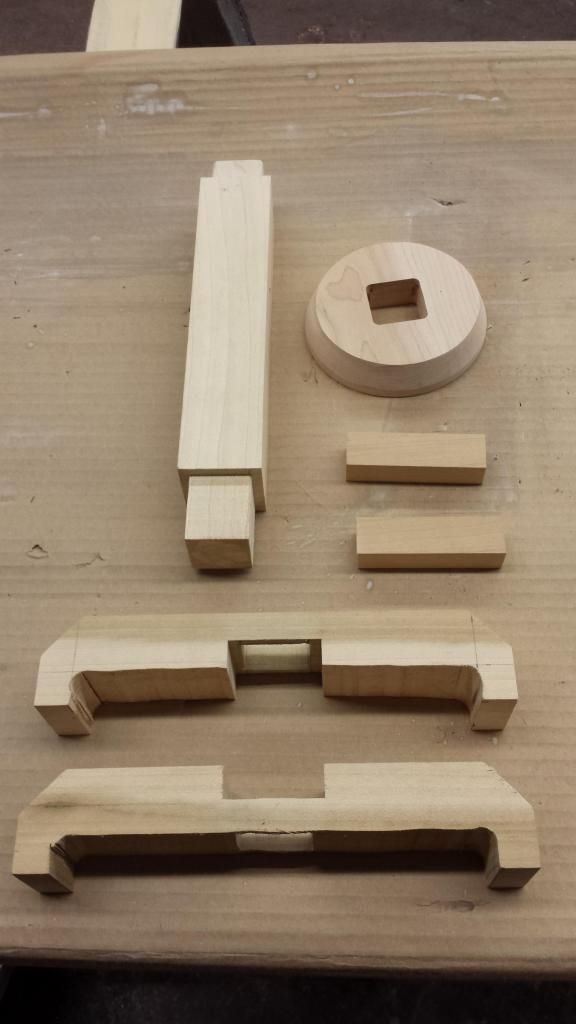
Here are some pictures of a kabuto stand that I started. I used a pattern off of sengoku daimyo. It's made out of poplar and maple, and able to be disassembled. I'm going to paint it black, with a gloss finish.
|
|
|
|
Post by Fukumitsu Noriatsu on Sept 1, 2014 1:03:23 GMT -5
|
|
Deleted
Deleted Member
Posts: 0
|
Post by Deleted on Sept 1, 2014 9:04:03 GMT -5
Greetings all, Here are some pictures of a kabuto stand that I started. I used a pattern off of sengoku daimyo. It's made out of poplar and maple, and able to be disassembled. I'm going to paint it black, with a gloss finish. That is a very pretty thing. Nice work! Looks like it's mostly poplar with maple for the top? If you don't mind, I'd like to know what tools you used and see pictures of the disassembled pieces. Personally, I wouldn't paint it. The raw wood will stabilize humidity inside the kabuto during display, and most paint will fill the kabuto with fumes that will make you dizzy when you wear it. |
|
|
|
Post by Fukumitsu Noriatsu on Sept 2, 2014 9:39:38 GMT -5
|
|
|
|
Post by Fukumitsu Noriatsu on Sept 2, 2014 16:42:03 GMT -5
Thank you! You are correct about the top plate being maple and the rest of being poplar. I was planning on painting it because poplar and maple were not available in japan during the period, also because I wanted to show the quality of finish I am able to produce. But I will keep the info about the raw wood stabilizing the humidity if I get around to making another kake out of pine or cedar.
Tools and Techniques:
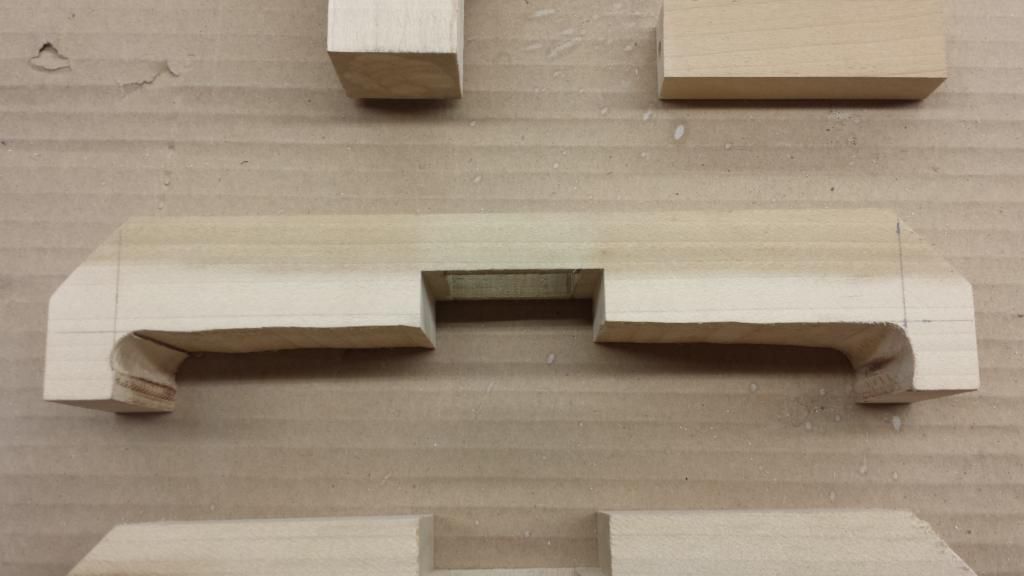
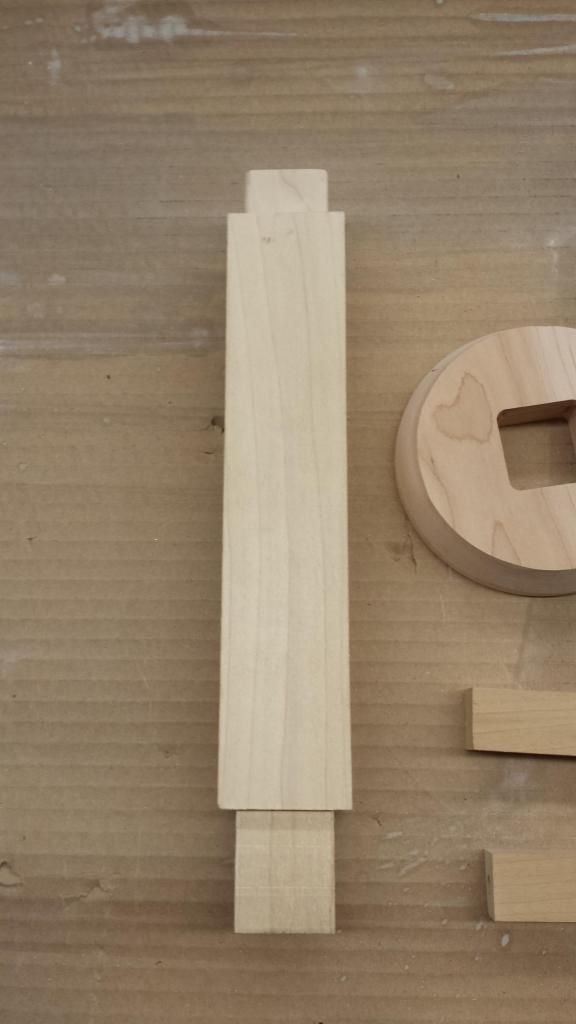
The legs and upright were squared using a planer and table saw. The channel that locks the legs together as well as the top and bottom shoulders were created using a dado blade on the table saw. To get the shape on the bottom of the feet, I first drew a square box as high and wide as I wanted, then drilled out the corners where the outside of the bit meets the lines. You can kind of see this in the first photo. Then, using apparently the worst band saw in the shop, cut to the outside edges of my holes. The square holes in the legs that the upright slides into were done much the same way, except I did those with a jig saw. The bevels on the legs were done with a compound miter box. The top plate was cut out on the cnc machine, along with the square hole in the middle of the top plate. To get the bevel on the top plate I used a ¾ inch chamfer bit. I know my explanation is a little brief, but this is the third time I’ve tried to write this so, yeah. Feel free to ask more questions if you want more in depth explanations about anything.
|
|
|
|
Post by Fukumitsu Noriatsu on Sept 2, 2014 16:44:08 GMT -5
Here are some pictures of all the parts sanded and ready for primer. 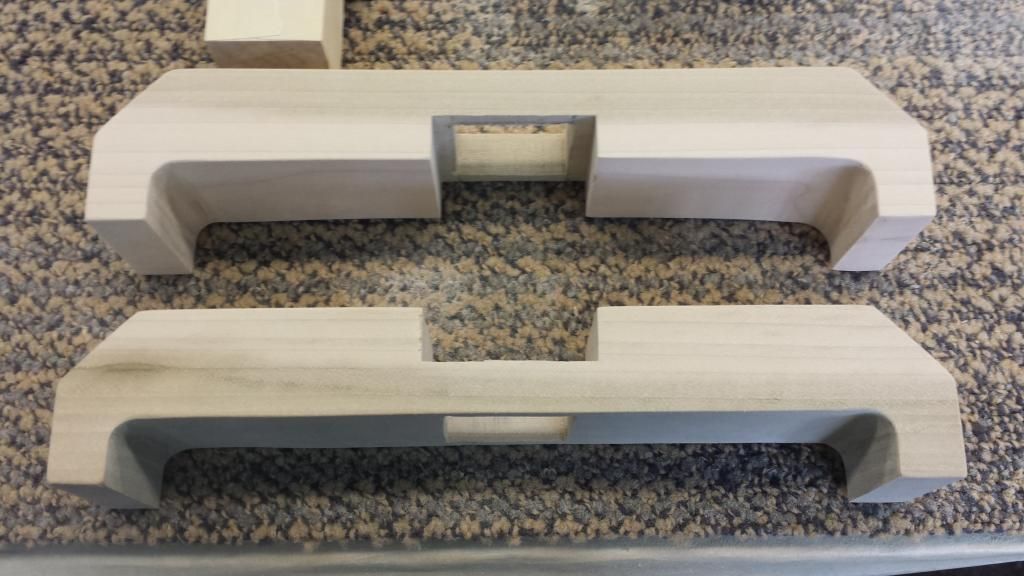 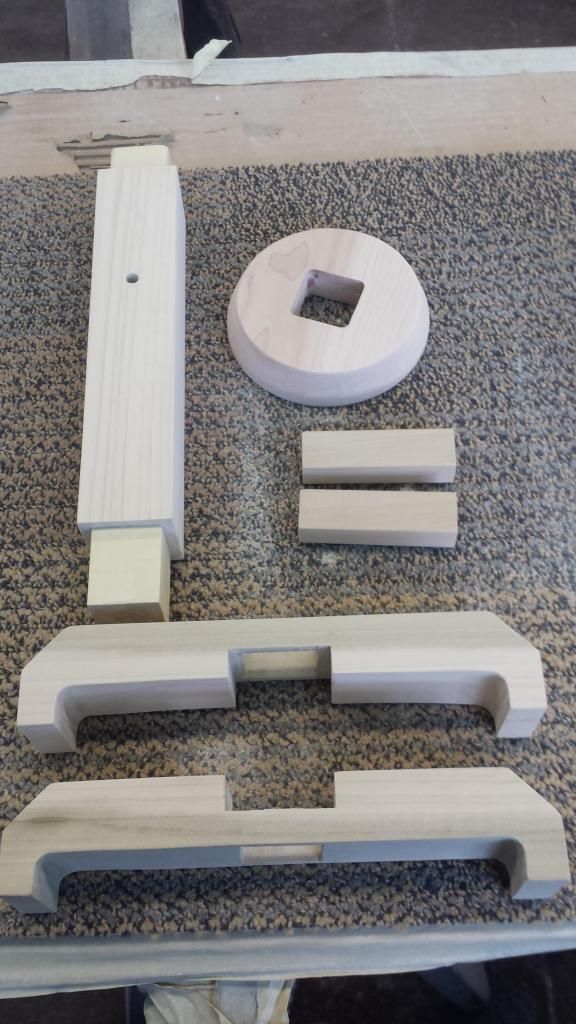 |
|
|
|
Post by Fukumitsu Noriatsu on Sept 2, 2014 16:45:08 GMT -5
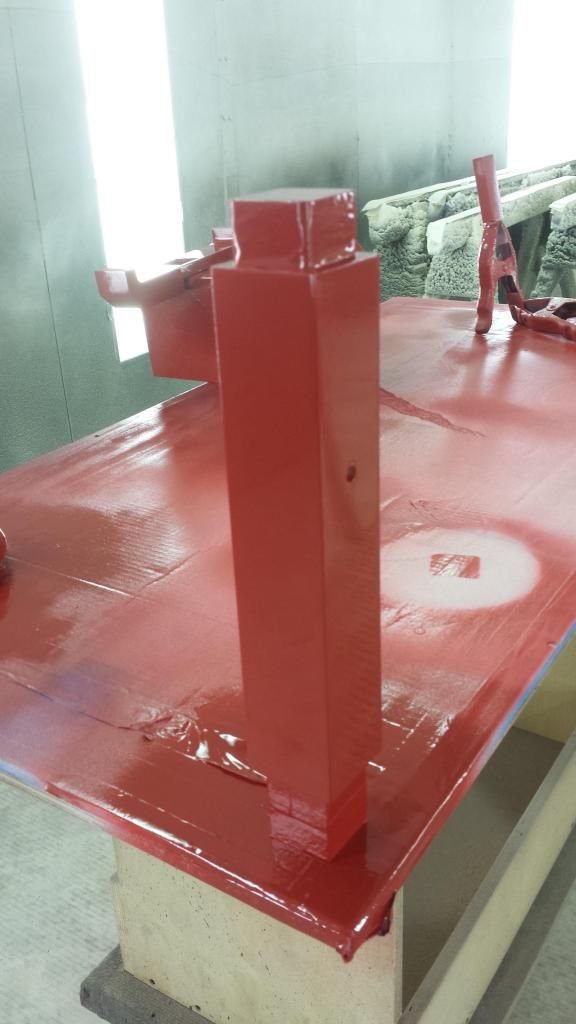
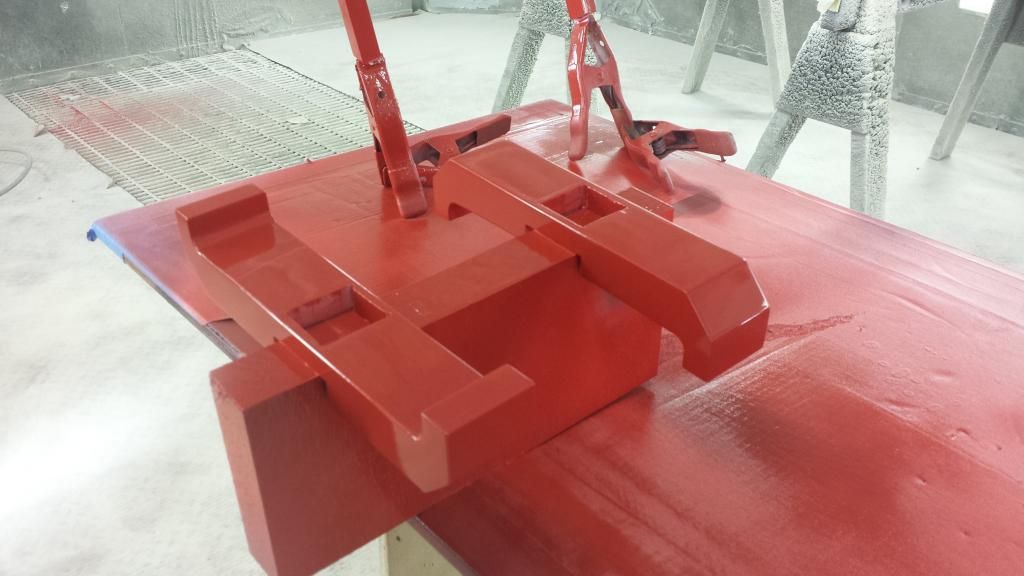
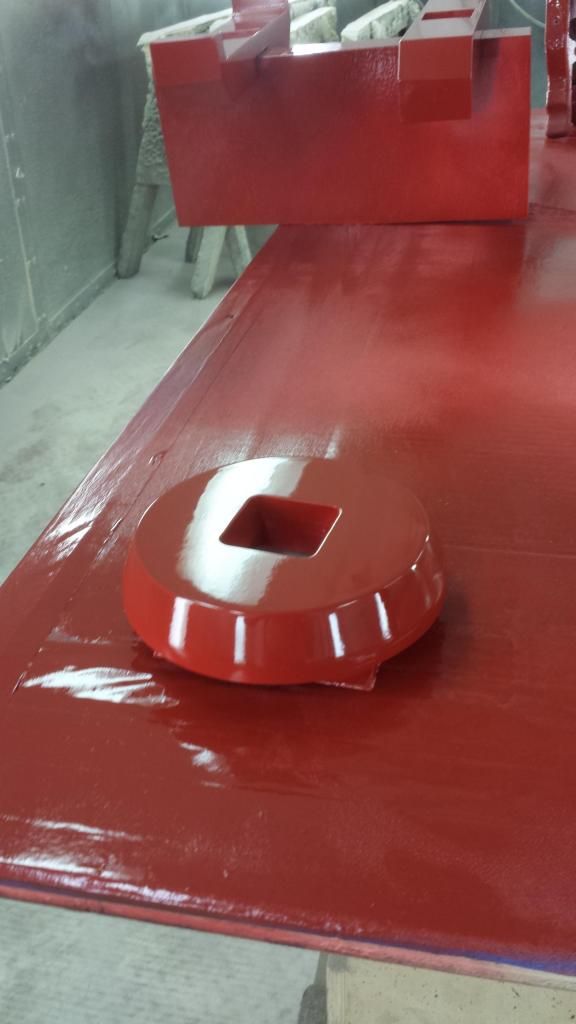
Here is a picture of everything primed. 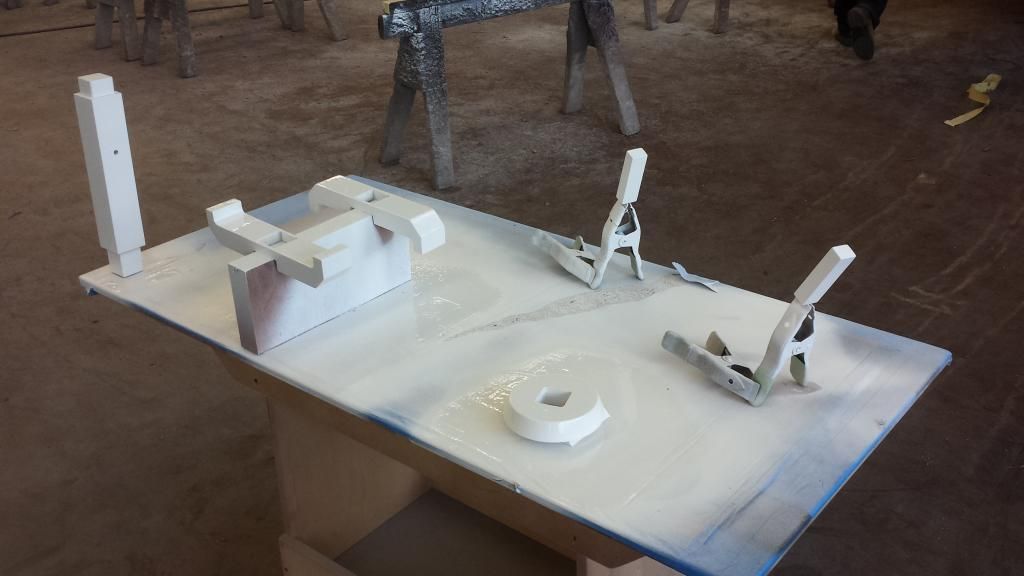 |
|
|
|
Post by Fukumitsu Noriatsu on Sept 2, 2014 18:06:58 GMT -5
I forgot to talk about the cross piece. I got lazy with it and just drilled a hole through the upright and the ends of the small cross pieces. I'm planning to glue them on with dowels inserted after it's finished.
|
|
|
|
Post by Fukumitsu Noriatsu on Sept 3, 2014 16:17:06 GMT -5
|
|
Lash
New Member
 perfection isnt an end result but a path to walk upon with your eyes closed.
Posts: 422
|
Post by Lash on Sept 3, 2014 21:07:26 GMT -5
OOOOHHHHH YEAHHHHHH!! THATS THE COLOR RIGHT THERE!!! awesome stuff my friend!! may have to talk you out of one when I actually get a kabuto lol!!
|
|
|
|
Post by Fukumitsu Noriatsu on Sept 5, 2014 9:37:15 GMT -5
Here are some pics of it all put together. 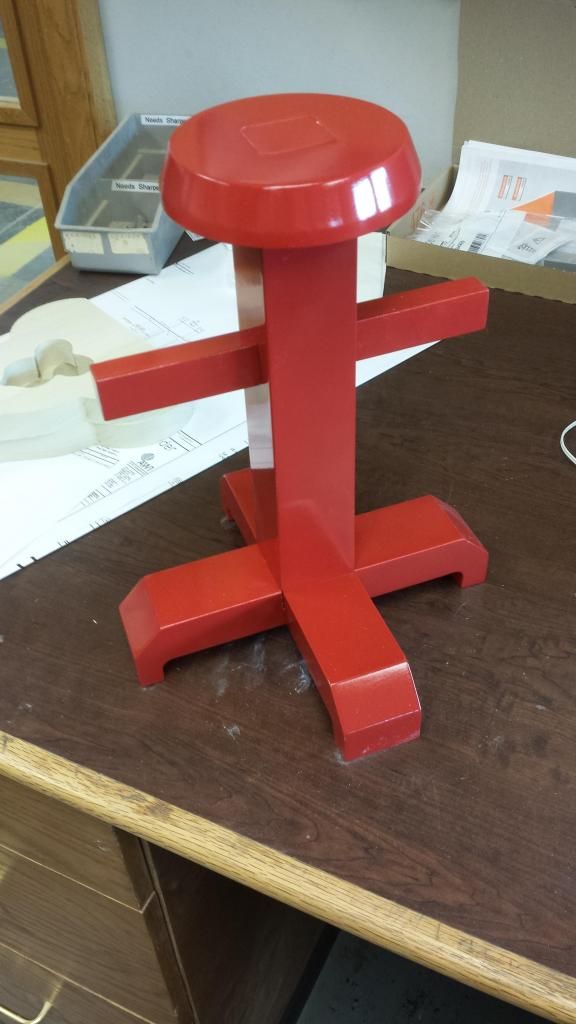 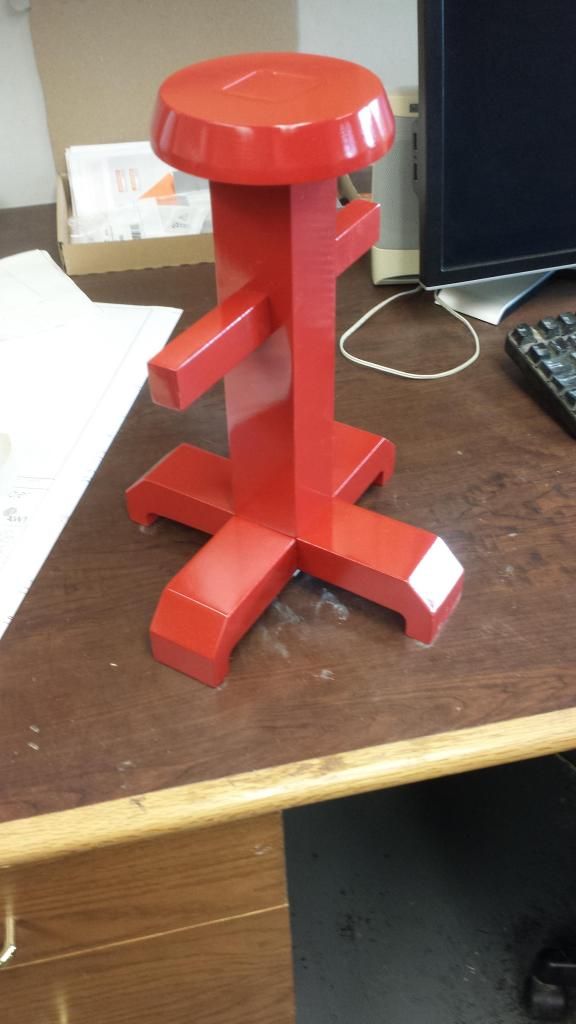 |
|