Post by Miura Suzume on Nov 3, 2018 7:59:32 GMT -5
Hello all!
Like many, I've been remiss in not posting the projects I've been up to over here. I'm going to start fixing that as of today! First up: My janky as heck first attempt at creating a kari-ebira quiver, based on instructions by Godai Katsunaga. I am by no means a woodworker or a metalworker or really any kind of worker, so this is only a prototype.
Unfortunately, I neglected to take any pictures while assembling the box itself. We used a thin pine for the base and the edges, with corner braces made of a few more chunks of pine. The slats are made of wooden dowels. I have been informed there was some kind of netting on the inside of the box to keep the arrows separate, but I haven't yet figured out how to attach that or where exactly it goes. Everything is attached with very small nails and/or wood glue.

We used a 3/4" steel rod for the backbrace. As I don't have lacquer and also really do not want to mess with lacquer ever, we acquired some black high-gloss enamel from a local home improvement store instead. Pardon the yellow light. I hate yellow lights so much. The stringing pattern for the rope on the backbrace was copied from a few other museum pieces.

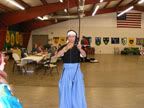
And now in white light, plus my arrows!

This thing is a monster. After taking this picture, we shortened the backbrace by several inches, and it's still much too long--it's gotten top-heavy. I'm leaving it as-is for the time being because I can't figure out how to get my arrows back IN the darn thing if I make it too much shorter. Version 2.0 will likely be much prettier and better-assembled. But for now, I have a thing I didn't have the day before, and that's what matters.
Like many, I've been remiss in not posting the projects I've been up to over here. I'm going to start fixing that as of today! First up: My janky as heck first attempt at creating a kari-ebira quiver, based on instructions by Godai Katsunaga. I am by no means a woodworker or a metalworker or really any kind of worker, so this is only a prototype.
Unfortunately, I neglected to take any pictures while assembling the box itself. We used a thin pine for the base and the edges, with corner braces made of a few more chunks of pine. The slats are made of wooden dowels. I have been informed there was some kind of netting on the inside of the box to keep the arrows separate, but I haven't yet figured out how to attach that or where exactly it goes. Everything is attached with very small nails and/or wood glue.
We used a 3/4" steel rod for the backbrace. As I don't have lacquer and also really do not want to mess with lacquer ever, we acquired some black high-gloss enamel from a local home improvement store instead. Pardon the yellow light. I hate yellow lights so much. The stringing pattern for the rope on the backbrace was copied from a few other museum pieces.
And now in white light, plus my arrows!
This thing is a monster. After taking this picture, we shortened the backbrace by several inches, and it's still much too long--it's gotten top-heavy. I'm leaving it as-is for the time being because I can't figure out how to get my arrows back IN the darn thing if I make it too much shorter. Version 2.0 will likely be much prettier and better-assembled. But for now, I have a thing I didn't have the day before, and that's what matters.