|
|
Post by mrcunningham on Dec 8, 2008 20:59:37 GMT -5
Nihon Katchu Seisakuben says:
"Period egawa is made using thin metal stencils placed on the surface of the leather. The printer then forces die into the cavities, actually impressing the leather at the same time as it takes the ink. You could also use a silkscreen, which is essentially the modern method. I’ve been known to use the extremely fine Sharpie pens to draw the designs onto the leather. The blue Sharpie works quite acceptably."
So...really? I can print up some egawa with navy sharpie? Is there a better way? Anyone have any experience they can lend, before I ink up a side of leather for my new combat dou?
|
|
|
|
Post by augifertangtang on Dec 9, 2008 1:22:22 GMT -5
It's so good to know I'm not the only one that is curious about this. The only person I know that has patterned egawa on their armor is Date, I asked him about it not to long ago and he had this to say:
Greetings
I simulated the egawa by making an Illustrator file that mimics historical patterns, but inserted my dragonfly kamon in the center instead of traditional Shishi or dragons.
Then I went to FedExKinkos and had a thermal transfer made. This I heat transfered to white leather, which worked suprisingly well. I used a heavy 8oz leather, which is thicker than egawa would traditionally be, but that is because I knew it would be subject to SCA heavy combat, over and over.
It has held up quite well, and has even discolered slightly over time, which makes it look even cooler!
The rest was just making sure that when I applied the leather I matched patterns.
Thank you for your comments on my web site. I am currently rebuilding it, so it will look better and have some new content in the future.
Luck to you, tomodachi.
Date Saburou Yukiie
I haven't tried it myself personally, but Date's turned out VERY VERY NICE. It's on his site if you want to see how it turned out. I hope it works out for you! I hope this helps! ~August |
|
|
|
Post by mrcunningham on Dec 9, 2008 16:52:03 GMT -5
Thermal transfer...HMMMM.... Thanks!
|
|
|
|
Post by Rokurou on Dec 9, 2008 20:22:16 GMT -5
|
|
|
|
Post by dianet on Dec 9, 2008 20:30:44 GMT -5
*sigh*
Date always looks so good in that Hunting armor.
|
|
|
|
Post by mrcunningham on Dec 11, 2008 21:15:04 GMT -5
So Kinko's says I'm still living in the Dark Ages if I think they'll do inkjet printing thermal transfers. So it's back to ink and stencil, I guess.
|
|
|
|
Post by mrcunningham on Dec 11, 2008 21:29:49 GMT -5
|
|
|
|
Post by Imagawa Tadamori on Dec 11, 2008 23:49:51 GMT -5
Tell FedexKinko's to look at this: www.fedex.com/us/officeprint/storesvcs/photos/gifts.html . If they'll do thermal t-shirt transfers, you're good to go. Leather dye is a finicky thing sometimes... it can bleed and run at the drop of a hat if you're not careful... and it only takes one run or bleed spot to ruin the entire piece of leather. If you go that route, try this: get a small foam brush and unpowdered nitrile gloves (do not use latex gloves - the solvents in the dye will make the latex gloves balloon and rupture). Put some dye in a bowl. Dip the tip of the foam brush in the dye and squeeze the brush with your fingers (hence the nitrile gloves). Foam brushes can hold an amazing amount of leather dye; but you want the control that a foam brush can offer. Squeeze the brush "almost dry" and use a really light touch. Keep a rag around so the glove doesn't drip on your leather piece (personal experience talking). Brush dye on the leather as needed; don't worry if it takes you 3-4 applications for adequate coverage - you're after good coverage with minimum penetration (thus minimizing bleed). Patience is your friend. Ganbatte, tomodachi. - Imagawa |
|
|
|
Post by mrcunningham on Dec 22, 2008 8:29:56 GMT -5
I've decided to go with the ink/sharpie method. I've spent about 3 hours just penciling in the stencils for a little more than 1 square foot of leather. I'm going batty from repetitive effort.
You know, I used to bring in armour projects for my high school students to work on during their detentions if my white boards were already clean. I may go back to that.
|
|
|
|
Post by mrcunningham on Jan 22, 2009 20:12:41 GMT -5
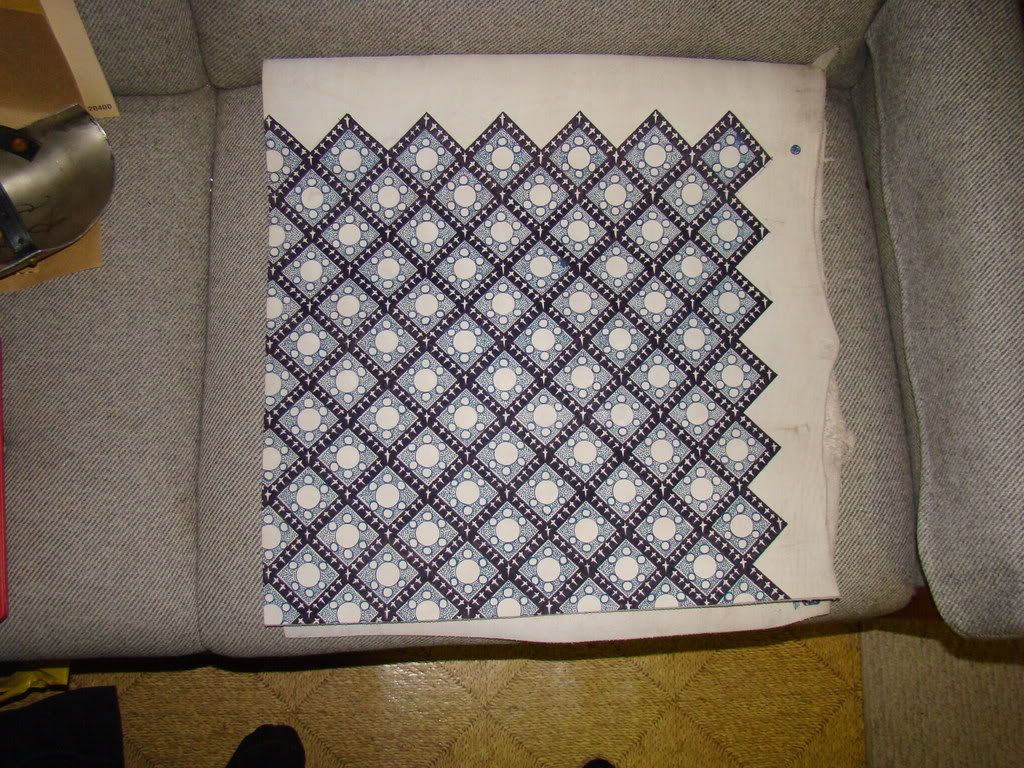
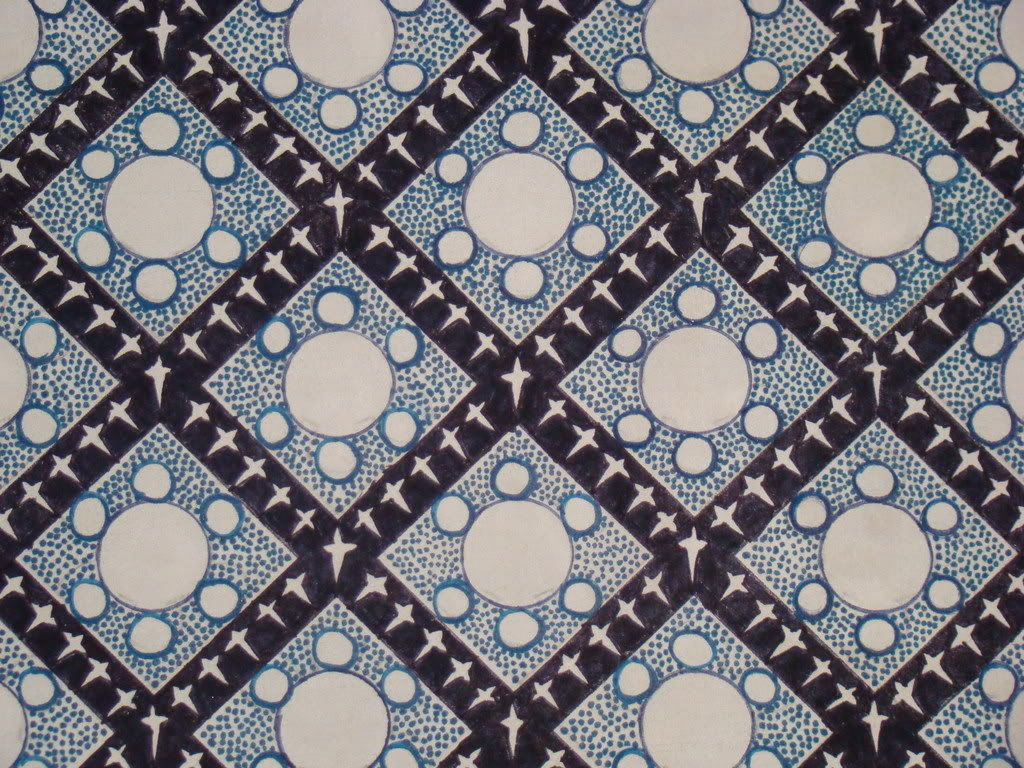
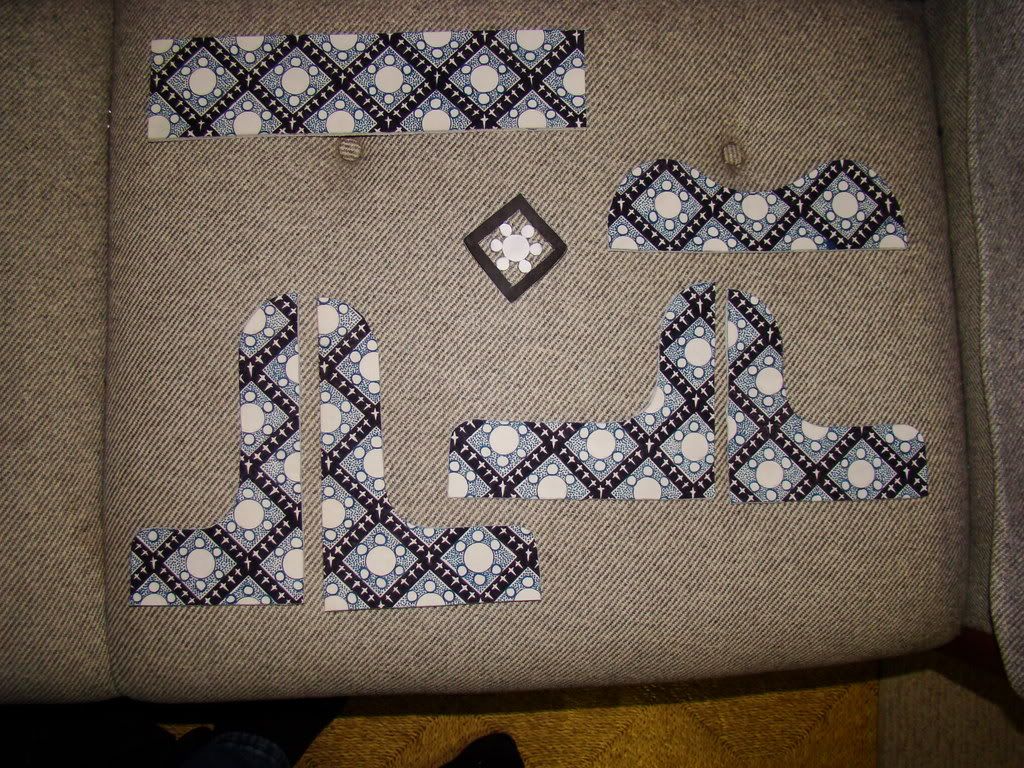
I've finished the egawa, more or less. The process I used: 1) Mock up in Photoshop a .jpeg (see below) of my device arranged in the size and shape of traditional egawa, allowing for a border. 2) Print and stencil with pencil the basic outline (sorry, no picture) all over the leather, after figuring out how much coverage I need to make my kanagu mawari. 3) Fill in the border using extra fine black sharpie and an L-square. This flubbed many of my hand-penciled stencils, so I had to essentially freehand many of them later. I drew all the stars freehand as well. (The white northern star on black is the symbol of the Northern Army of the East Kingdom and, though it's clearly a scadianism, it didn't look too out of place to me.) 4) Here's where it got frustrating. I started to draw in the white circles with a navy sharpie, and it worked for about an afternoon. Then they all suddenly died. I have no idea why. Nevertheless, I gave up and bought a DecoColor extra fine oil paint marker in "ultramarine" and it looked almost exactly the same. _I would HIGHLY recommend skipping the Sharpies entirely and going all DecoColor._ The saturation was amazing and the color was very easy to control. Anyway, I drew in the circles. 5) Draw in about a million bajillion dots. 6) Proceed to cut up the beautiful leather just hours after it's finally finished. Total time: Approximately 20-30 hours for about 18" by 18" of egawa. The (outline) pattern:  The completed egawa:  Close-up:  Cut out, with the paper stencil for reference:  Critique, comments, and suggestions welcome. PS: I'm missing my watagami, because I need to attach the kanagu mawari first, then I'll fit them and post pics of the finished dou! |
|
Saionji Shonagon
New Member
 One dreamed of becoming somebody. Another remained awake and became. (Found in a fortune cookie.)
Posts: 7,240
|
Post by Saionji Shonagon on Jan 22, 2009 21:07:09 GMT -5
That looks terrific! I hope the Deco Color markers are permanent, that's all.
Very nice work.
|
|
|
|
Post by tengumoon on Jan 22, 2009 21:59:30 GMT -5
Simply very way cool!
|
|
|
|
Post by Imagawa Tadamori on Jan 22, 2009 22:30:30 GMT -5
That looks great!  You wouldn't have been able to pull off that level of detail with leather dye; good call on the DecoColor markers. - Imagawa |
|
|
|
Post by mrcunningham on Jan 28, 2009 20:18:32 GMT -5
I'm glad Makiwara-dono got me scared, 'cause now I've bought and applied "satin-shene" sealant. The leather now has that nice darkened look of the real stuff.
Oh, also it's attached to a brand-spankin'-new, just-completed dou, to be unveiled once I can convince my Lady to take some pictures of it... ETA a few days.
|
|
|
|
Post by Kôriki Ryuushirô Hiroshige on Jan 29, 2009 7:52:57 GMT -5
Looks awsome
|
|